Welcome to Lesson One, The Neck. Before you get started, read through the entire lesson first! Better yet, read through and visualize yourself actually doing each step. Imagine the feel of the saw against the wood, the smell of freshly cut Spanish Cedar, etc. I call this mental pre-play.
|
|
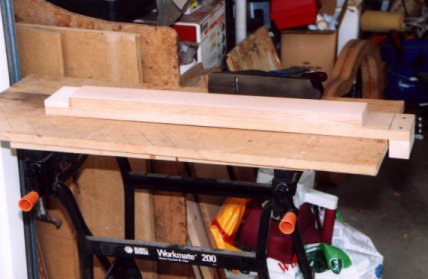
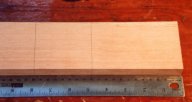
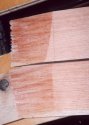
Our first step is to square up our neck blank. That means we want all the edges to be square. Use your small square to check the edges. In the photo you will see the blank sitting on top of a bench hook. The bench hook has a stop on top that the work piece butts up against. The stop that faces down, hooks over the end of the bench top preventing movement of the work piece and the bench hook. |
|
|
We want to square up and dimension the neck blank so it has a width of 75mm; length of 610mm (24") or more; thickness of 20mm. I use a marking gauge and scribe the final dimensions onto the blank. Then using the smoothing plane I carefully plane down to the markings checking for flattness and squareness of the edges along the way. Take your time. Once you remove wood you can not put it back! Measure and check for square frequently |
|
|
This image shows the bench hook in use. Here I am using the smoothing plane to thickness the blank to the dimensions mentioned above. |
|
|
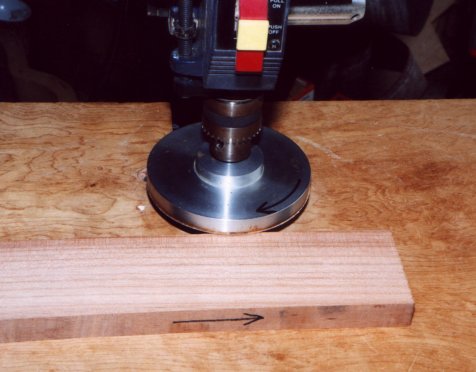
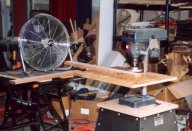
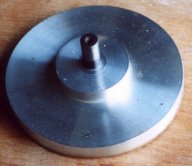
Another way that I thickness my timbers is by using my drill press and a 5" diameter sanding disc. This method is very accurate. John Gilbert showed me this trick. Many of my parts are thicknessed in this fashion. The fan is used to get rid of the dust. Make sure you ALWAYS wear a dust mask. Wood dust causes lung damage. |
|

|
The stock is feed into the direction of the disc's rotation. |
|
|
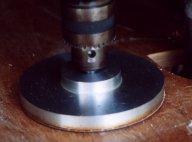
Close-up of the disc in the drill press. |
|
|
Close-up of the disc. |
|
|
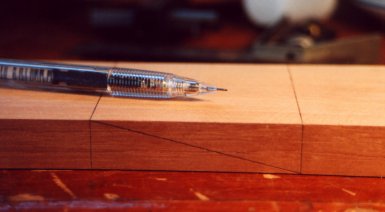
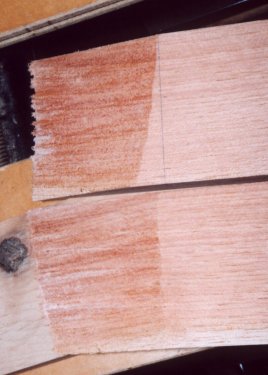
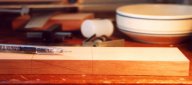
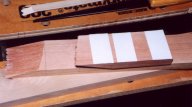
Once the neck blank is dimensioned we are going to mark it for the 14 degree head angle. From the end that is going to be the head, measure 120mm and draw a line all the way around the neck blank. Then draw a second line 78mm from the first. Take your time and mark it as precise as possible. I use the "Pentel" .5mm mechanical lead pencils because the line is always the same size compared to a traditional pencil that you have to sharpen and the line gets thicker as it is used. |
|
|
Now the two lines are connected at a diagonal. Use a straight edge. Again, be as precise as you can with the layout of these lines. Do this on each side of the neck only, not on the top or back.
If we did a good job thicknessing our blank to 20mm, our 78mm lines connected diagonally will yield a 14 degree head angle. This angle is different from the Hauser plan, but is an average head angle used by many makers. I believe Hauser like to use a 7 degree angle. The shallow angles work great for the "V" style head joint. A steep angle like 14 degrees is not recommended for the "V" joint. |
|

|
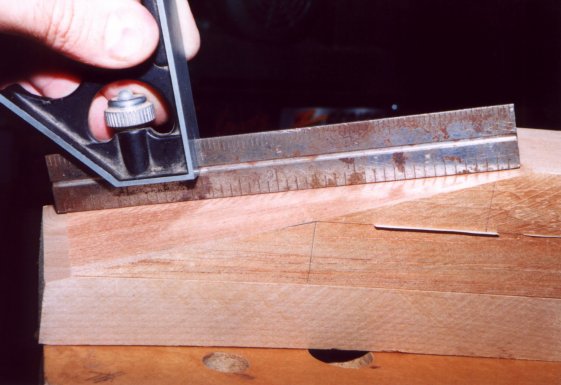
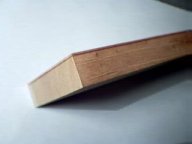
Here's a close-up of the layout. |
|

|
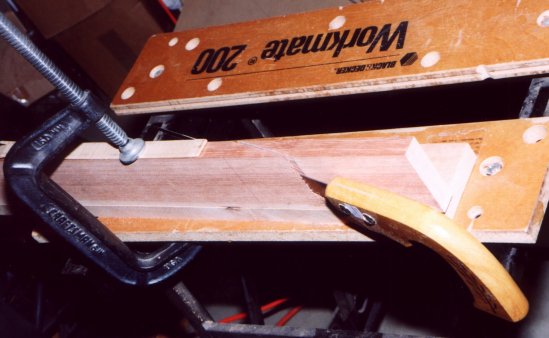
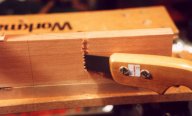
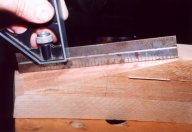
Now it is time to cut the neck splice. Look at the photo carefully. I have a piece of scrap wood under the neck blank which is on it's side. The treble edge of the neck is visible. I call this the reference edge. All my important measurements are made off this edge. In case you only have one perfectly square edge make it this one.(Now he tells us #@*!) I have another piece of scrap protecting my perfect edge so the clamp doesn't mar it.
Making the first cut. Choose which side of the lines you are going to cut to. Make a few back strokes of the saw to get started. Then take your time, cut slowly and as accurately as possible. |
|
|
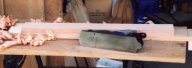
In this close up you can see the inexpensive saw I used. You can even see the price tag and free advertising for the store. The cut happens to be right on the line....or so I thought! |
|
|
Yikes!!! I goofed @#*%!!! Actually the saw drifted, still my fault. The correct hand saw to use is a back saw. I usually use a band saw. If this happened to you, do not dispair! I will show you how to fix this in the next few steps. There is no change in the procedure due to this error. Lucky for us! |
|
|
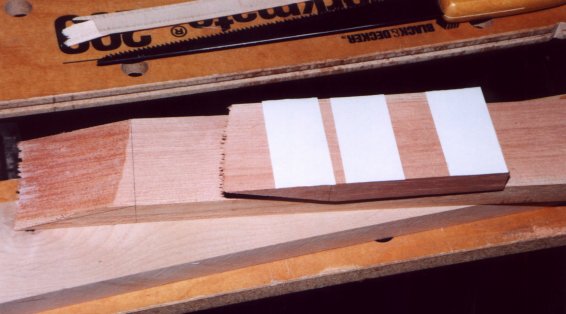
One of my favorite "tools" is double sided carpet tape. I use the cheap white stuff that Sears sells. The brand is "Manco, Inc." Here is the url www.duckproducts.comDon't use clear. It's too strong! On the back of what is going to be the head, add a few strips of double stick carpet tape at least an inch from the knife edge of the head. |
|

|
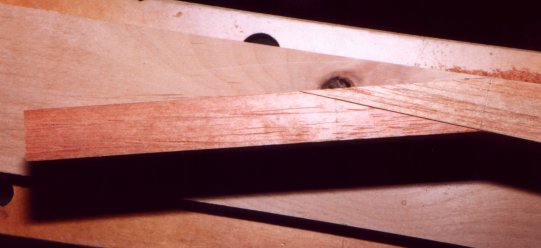
If you cut a perfect splice, line the edge of the head to the edge of the head taper on the neck. If you goofed like I did try to split the difference like what is shown in the photo. Press the two pieces together so the carpet tape sticks and holds the two together. You will need a piece of scrap under the neck. Line up the edge of the neck to the edge of the scrap. Put a clamp on the long neck blank. Make sure the clamp is far enough back on the neck so that it does not get in the way of the plane. |
|
|
Using either the block plane or smoothing plane, level the faces of the wood we just cut. Take your time and do not rush. Check the suface frequently for squareness with the edge of your square or a flat piece of steel. |
|
|
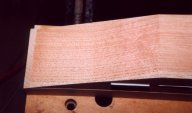
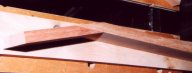
When finished it should look like this. You can see the end of the two pieces are square to the edge of the neck. To release the carpet tape I use Acetone. I pour a small amount between the two pieces of wood and the tape releases it's grip. Twist back and forth until they release. Be carefull you do not harm the nice crisp edges of the head and neck splice. |
|

|
Flip the head over and check your work. Look for gaps. If there are gaps you can true up the gluing side of the head with a sanding block. Usually the middle is the only part that needs any sanding. Try to avoid the edges of this face. When everything looks nice and tight proceed to the next step, glueing the head onto the neck. |
|
|
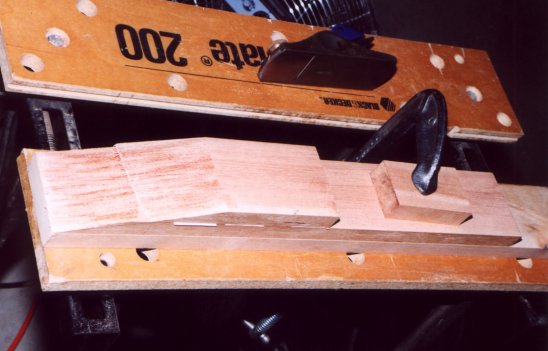
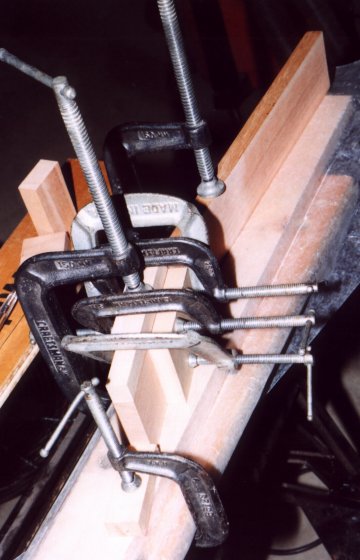
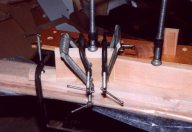
In this step I am performing a "dry run". That means I go through the whole clamping step without any glue to make sure everything is set up properly and I'm familiar with the process. Dry runs are very important, so do not skip this step.
I start with a scrap board covered with wax paper. Then I lay the neck and head on their treble side. Place a clamp on the neck near the middle.(The clamp to the right in the image) Next we put a stop at the edge of the head on the piece of scrap.(The clamp to the left in the image) These two clamps and the stop prevent the two pieces from slipping when we tighten the clamps that join the pieces together. Thier are a total of 5 clamps on the joint itself along with 3 scrap blocks. There is one scrap block covered with wax paper on each side of the joint and a third block that gives downward pressure to the head and neck. Do not use a lot of pressure for this block. Just enough to keep the head and neck in position. Once I add glue to the joint I add the clamps and blocks in this order, first the three blocks are set in place, second the lower clamps are put on only with light pressure, then the upper clamps with light pressure, the last one is the one that pushes the head down toward the scrap board with light pressure. Now I tighten the four clamps. You should see a lot of glue squeeze out. If you did not clamp down the neck and add the head stop your head will slide away from the neck blank. You must add the stop! Set this a side for 24 hours.
|
|

|
Here is another view of the assembly. |
|
|
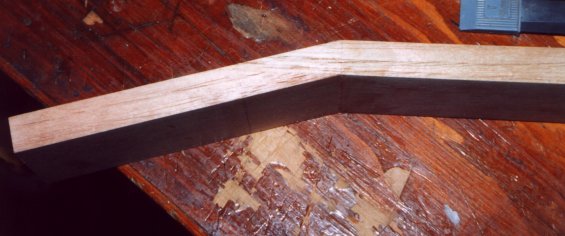
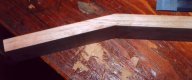
After 24 hours remove the clamps and it should look like this. |
|
|
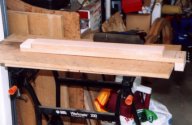
Another view. End of Lesson One |
Next week, Lesson Two-The Neck part 2, we will taper the neck, thickness the head, and add the head plate.